
My apologies, I am really behind in my blogging. We have been busy with a lot of activities in addition to the fireplace project and I haven't made time for updating my posts. So with that said here are some additional photos and an entry on the efforts we've made to create a new fireplace for ourselves.
After demolishing the old facade and removing the damaged box, Kevin had to chisel out the piles of mortar inside the old space surrounding the box. Once this was done he headed up to the roof to dig off the incredibly thick mastic that was around the chimney pipe connection. Once this was off he could remove the old chimney pipe and covered the top until we could purchase and install our new fireplace.
 |
| There were all of these piles of extra mortar on inside of the fireplace surround that needed to be removed |
 |
| The thick layer of mastic around the exterior chimney pipe that Kevin had to peal away to be able to separate the pipes |
 |
| Old chimney top and cap |
 |
| Kevin and Cameron removing interior pipe once the top was removed |
 |
| Almost out, Kevin had to take his Sawzall to the pipe to be able to remove them |
 |
| DONE - just need to take out the old wood and set new ones in place for the new unit |
Once all this was done we loaded the girls up and drove to Orlando to the warehouse that sells and installs these units. With much of his staff away that day the owner took care of our needs and made the arrangements for the unit we chose to be delivered and installed the following week.
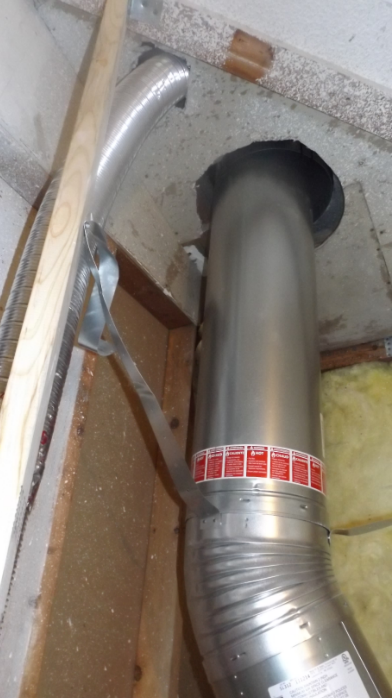
The truck arrived and the two gentlemen made quick work of installing the firebox. We chose to set it higher on blocks both for the appearance and practicality of heat distribution. They then added the new chimney pipe and an additional fresh air pipe that had never been installed on the original unit.


 |
| Chimney Pipe installation |

 |
| Both pipes now installed along with our new firebox. |
Once these were in they took the measurements they needed for manufacturing a new chimney top that would need to be added to the chimney pipe. This needed to be measured once the new unit was in for proper size and height that this unit requires. They set the old one on top in the meantime and said we could test the fireplace out, and then would return in a few days with our new chimney top.
The owner of the company had told us that we needed to make a few small fires initially to season the unit, so the moisture that collects in the cement backer as a result of all the humidity here in Florida could be slowly removed and not risk cracking it by building too big a blaze right away.
 |
| We still need to repair the drywall up at the top and add some to the back of the fireplace for insulation and safety |
Once the guys had left, I made our first fire in our new unit. Our dog Bea has always loved sitting near the warmth and immediately headed over to sit close. Once I had a small fire going Hannah and Bea sat together to enjoy it.
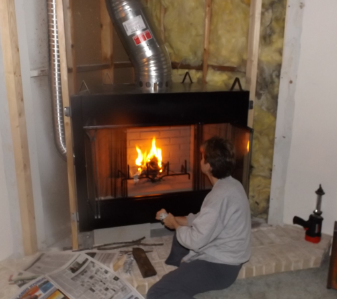
 |
| Our first fire in this new fire place and at this home |

That was on Tuesday and on Friday the men showed up again with our new fireplace top and to add a fire shield to the inside ceiling portion of the fireplace. With that done, it was now time to move on to the drywall. That I will leave for my next post, and promise not to take so long.

No comments:
Post a Comment